
← Human Anatomy and Physiology Practicals
Study of appliances used in experimental physiology
1. Aim
To identify the main appliances used to stimulate a nerve-muscle preparation and record a muscle response, and to explain each appliance's place in the recording chain. [1, 2]
2. Requirements
Instructor-approved demonstration units or labelled photographs of a stimulator, electrodes, myograph or force transducer, recording drum or digital acquisition interface, time marker or calibrated time axis, leads and switches, and a specimen board or stand. An observation sheet, dry hands, and laboratory protective equipment are required for any physical demonstration. The exact devices, power supply, calibration method, and local electrical-safety instructions are specified in your college lab manual and instructor's method sheet. No animal preparation is needed for this identification exercise. [2, 3]
3. Theory
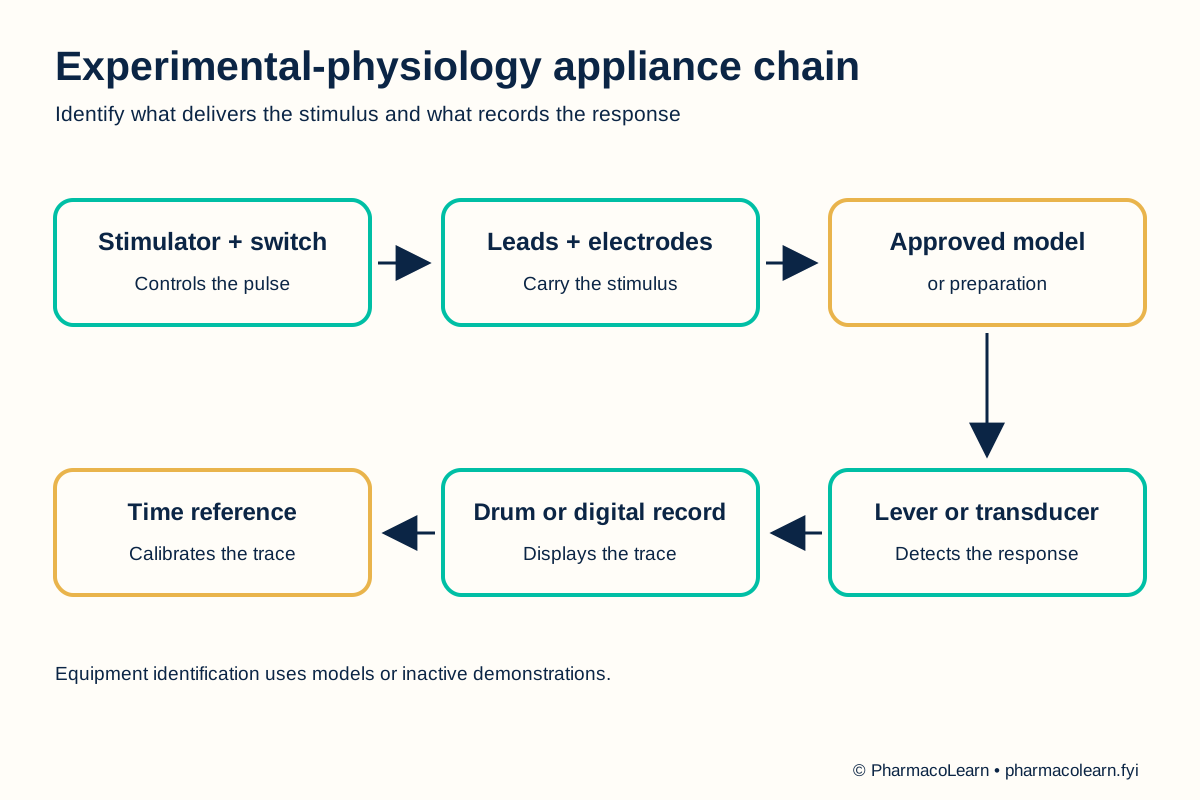
The apparatus chain begins with a controlled stimulus. Electrodes deliver that stimulus to the assigned preparation. A lever on a myograph or a force transducer converts movement or tension into a recordable signal. A kymograph records against a moving surface, while a digital interface records against time electronically. A time mark or calibrated time axis lets the observer identify stimulus, response onset, peak, and recovery. The method of recording affects the shape and scale of the displayed trace. Historical nerve-muscle demonstrations use a sciatic nerve and gastrocnemius muscle, but identification of the equipment does not require students to prepare or handle tissue. [2, 3]
4. Procedure
- Ask the instructor which units may be handled. Keep powered apparatus disconnected until the instructor has approved the setup. The local electrical-safety and handling rules are specified in your college lab manual and instructor's method sheet. [2]
- Read the label or front panel of each appliance. Separate the stimulus source, electrodes, response detector, recorder, and time reference into the observation table. Do not infer a device's function from appearance alone. [2, 3]
- Follow the labelled connection diagram from stimulus source to electrodes. On a demonstration model, point out where a sciatic nerve would be positioned. Do not apply a stimulus to any tissue or person during this identification step. [2, 3]
- Follow the response path from the muscle attachment to a myograph lever or force transducer, then to the recording drum or digital display. Identify which part changes mechanical movement or tension into a visible trace. [2, 3]
- Locate the time marker or calibrated time axis. Explain how a stimulus mark can be aligned with the beginning of a muscle response. Record the actual time calibration here from the local instrument or archived trace. [2]
- Cover the labels and reconstruct the whole chain in order. Ask the instructor to check uncertain identifications and record any appliance not available locally as not supplied. [2]
- Return components to their assigned places. The instructor disconnects powered equipment and manages any biological material under the approved institutional procedure. [4]
5. Calculation, graph, or images as appropriate
There is no numerical calculation. Complete this identification table from the appliances supplied. [2, 3]
| Appliance or component | Role in the chain | Supplied locally? |
|---|---|---|
| Stimulator and switch | Sets and initiates a controlled stimulus | Record here |
| Electrodes and leads | Carry the stimulus to the assigned preparation | Record here |
| Myograph lever or force transducer | Detects muscle movement or tension | Record here |
| Kymograph or digital recorder | Displays the response as a trace | Record here |
| Time marker or calibrated time axis | Places response events in time | Record here |
| Board, clamps, and stand | Hold the approved setup in position | Record here |
Worked identification example: In a digital setup, the force transducer detects the muscle response and the computer interface displays it against time. The exact model and scale in the local laboratory are specified in your college lab manual and instructor's method sheet. [3]
6. Result
Appliances identified and their roles assigned: Record here. Record which items were demonstrated and which were represented only in a chart or archived setup. [2]
7. References
- Pharmacy Council of India. Pharm.D. Regulations, 2008, Appendix A. Lists study of appliances used in experimental physiology.
- Mohanlal Sukhadia University. Practical Zoology: Vertebrate, experimental physiology section. Recording drum, myograph, electrodes, stimulus circuit, and muscle trace.
- William Paterson University. Animal Physiology Lab Manual, Lab 6: Frog Leg Muscle Contraction. Modern stimulator, force transducer, and digital recording chain.
- Committee for Control and Supervision of Experiments on Animals. Acts, Rules and Guidelines. Institutional oversight and animal-use guidance.
Back to Human Anatomy and Physiology Practicals · All Pharm D Practicals · Pharm D
Theory notes: Human Anatomy and Physiology