
← Human Anatomy and Physiology Practicals
Determination of bleeding time
1. Aim
To demonstrate the Duke bleeding-time method and record the elapsed time from a supervised skin puncture until free bleeding stops.
2. Requirements
A trained instructor or authorized collector; sterile single-use lancet; approved skin antiseptic and sterile swabs; stopwatch; filter paper; protective dressing; sharps container; and biological waste container. The WHO Duke method describes an ear-lobe puncture with checks at 30-second intervals. Its older cleaning reagent is not adopted here. The locally approved antiseptic, puncture site, collection policy, and whether students may observe a live procedure are specified in your college lab manual and instructor's method sheet. Wear a laboratory coat, gloves, and eye protection as directed. [1, 2]
3. Theory
Bleeding time is the interval between a small standardized skin injury and the end of free bleeding. It reflects several interacting features of primary haemostasis, including vessel response and platelet plug formation. The Duke method periodically touches emerging blood to filter paper without pressing on the wound, then records when the next scheduled check yields no new spot. The puncture, pressure, and timing can substantially affect the measurement. The test has poor value as a routine clinical screen for bleeding risk, so this article is for supervised syllabus teaching only and must not be used to guide care or a procedure. [1, 3]
4. Procedure
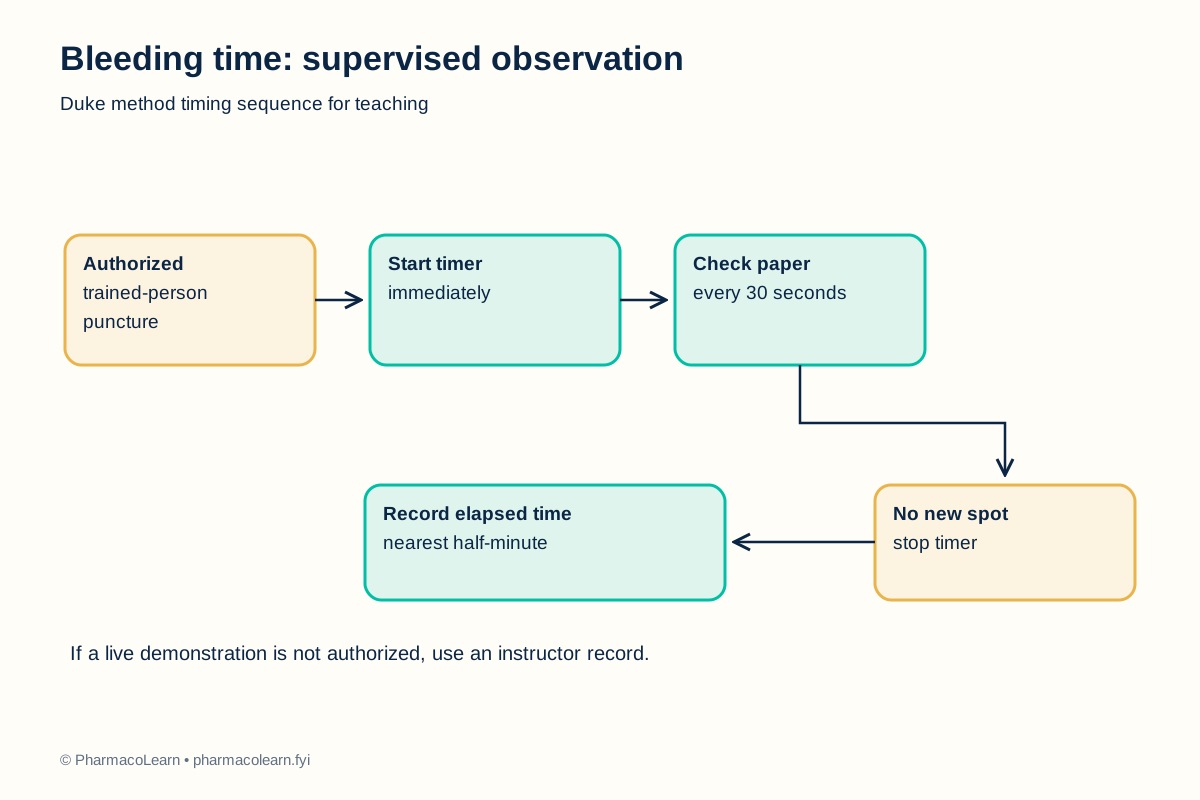
- The instructor confirms that a live demonstration is authorized, the person has agreed to it, and the laboratory's puncture and exposure protocols are available. If no live puncture is authorized, use an instructor-supplied demonstration record and complete only the timing exercise. Follow the instructor's local decision for this supervised exercise. [2]
- Prepare the stopwatch and filter paper before any puncture. Identify a fresh area of paper for each timed check. Put on required protective equipment. A trained person cleans the approved site with the approved antiseptic and allows it to dry. The exact site and antiseptic are specified in your college lab manual and instructor's method sheet. [1, 2]
- The trained person uses one sterile lancet for the authorized puncture and starts the stopwatch immediately. The site must not be squeezed. Place the used lancet directly into a sharps container. Students do not puncture themselves or one another. [1, 2]
- At 30 seconds, the trained person gently touches the emerging blood to a fresh paper area without touching the skin. Repeat with a fresh paper area at each subsequent 30-second interval. Do not press or rub the wound. [1]
- When a scheduled check makes no fresh blood spot, stop the timer and record the elapsed time to the nearest half-minute. If bleeding is excessive, the site needs care, or the demonstration becomes unsafe, stop the exercise and follow the local response plan. [1, 2]
- Apply pressure and a dressing as directed by the trained person. Dispose of contaminated paper in the designated container, clean the area, remove gloves, and wash hands. [2]
- Record the timing sequence and any deviation. Compare with your laboratory's current reference interval and interpretation guidance; the teaching result is not a clinical screening result. [1, 3]
5. Calculation, graph, or images as appropriate
Use one mark for each scheduled paper check. The following is an invented timing example, not a test on a person. [1]
| Time from puncture | Example paper check |
|---|---|
| 0 seconds | Timer started |
| 30 seconds | Blood spot |
| 60 seconds | Blood spot |
| 90 seconds | Blood spot |
| 120 seconds | Blood spot |
| 150 seconds | No new spot |
Worked example: The first check with no new spot is at 150 seconds. Divide by 60 to report 2.5 minutes, to the nearest half-minute. Record the actual observed sequence separately here. [1]
6. Result
Record the observed time in minutes and any deviation here, naming the Duke method. This practical result does not diagnose a disorder or predict procedural bleeding. [3]
7. References
- World Health Organization. Manual of Basic Techniques for a Health Laboratory, second edition, section 9.8. Duke method sequence and reporting convention. 2003.
- World Health Organization. Guidelines on Drawing Blood, capillary sampling. Trained collection, sharps handling, and care after puncture. 2010.
- College of American Pathologists and American Society of Clinical Pathologists. The preoperative bleeding time test lacks clinical benefit. Archives of Surgery. 1998. Clinical limitation of routine bleeding-time screening.
- Pharmacy Council of India. Pharm.D. Regulations, 2008, Appendix A. Syllabus authority for bleeding time.
Back to Human Anatomy and Physiology Practicals · All Pharm D Practicals · Pharm D
Theory notes: Human Anatomy and Physiology