
← Human Anatomy and Physiology Practicals
Study of the appendicular skeleton using charts, models, and specimens
1. Aim
To identify the limb bones and the pectoral and pelvic girdles on teaching charts, models, or approved specimens, and explain how the girdles connect the limbs to the axial skeleton. [1, 2]
2. Requirements
A labelled skeletal chart for orientation; unlabelled upper-limb and lower-limb charts or models; pectoral-girdle and pelvic-girdle models; an observation sheet; and gloves if the instructor provides specimens that require them. The exact models, specimen-handling rules, and assessed landmarks are specified in your college lab manual and instructor's method sheet for the local collection. No dissection or body contact is required. [1, 2]
3. Theory
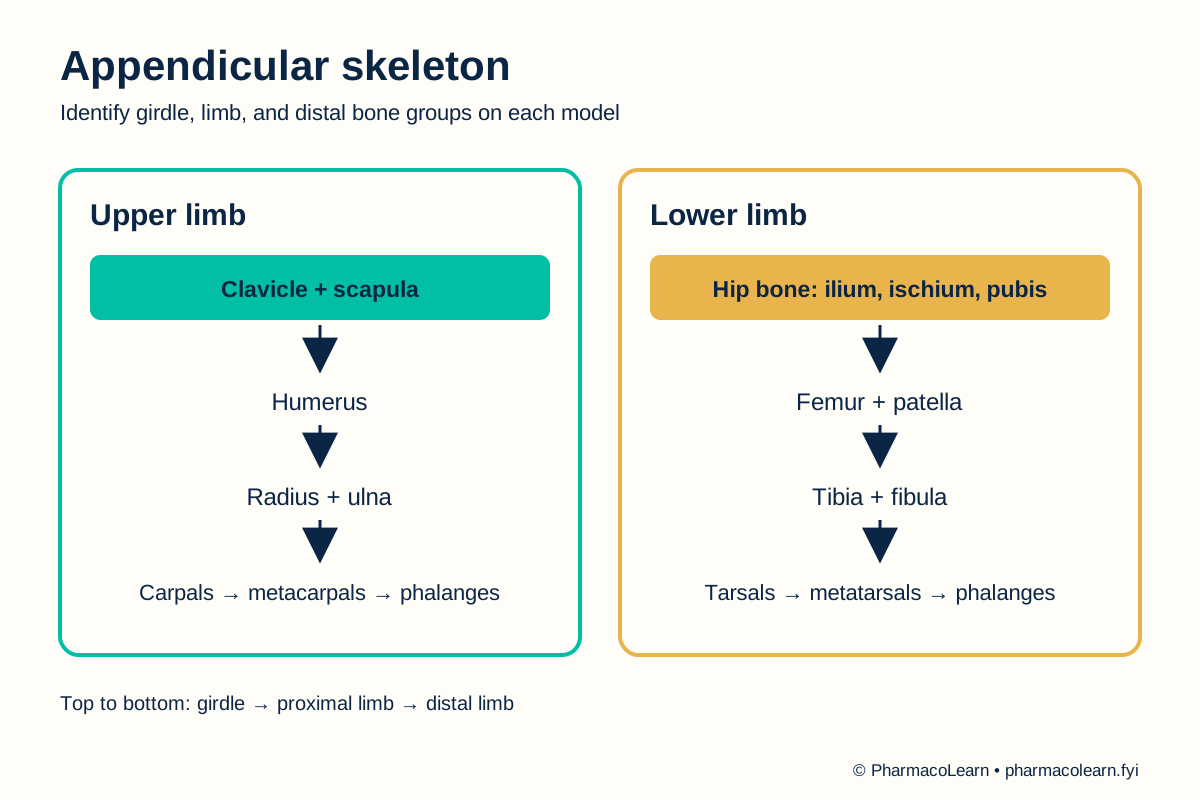
The appendicular skeleton comprises the bones of the upper and lower limbs plus the girdles that attach them to the central skeleton. The pectoral girdle contains the clavicle and scapula; the pelvic girdle includes the hip bones. In the upper limb, the humerus is proximal to the radius and ulna, followed by carpals, metacarpals, and phalanges. In the lower limb, the femur is proximal to the tibia and fibula, followed by tarsals, metatarsals, and phalanges. Limb joints permit movement, while the girdles transfer forces between limbs and trunk. The sacrum belongs to the axial skeleton even though it forms part of the bony pelvis. [2, 3]
4. Procedure
- Confirm with the instructor which chart, model, or specimen may be handled. Check for loose parts and sharp edges. Follow the local handling and cleaning rule: follow your college lab manual and your instructor's method sheet for quantities, editions, and instruments. [1]
- Orient the model in anatomical position. Locate the axial skeleton first, then identify the pectoral and pelvic girdles as the transition to the upper and lower limbs. [2]
- At the shoulder, find clavicle and scapula. Follow the upper limb from humerus through radius and ulna to the wrist, palm, and fingers. Name carpals, metacarpals, and phalanges by region. [2]
- At the hip, identify a hip bone and its ilium, ischium, and pubis if the model shows their boundaries. Follow the lower limb from femur and patella to tibia and fibula, then to tarsals, metatarsals, and phalanges. The available detailed landmarks are specified in your college lab manual and instructor's method sheet. [2, 3]
- Compare the hand and foot. Identify corresponding bone groups, then note that their arrangement supports different functions. Do not infer a missing bone simply because a model omits it. [2]
- Cover the labels and repeat the identification from a different view. For each named region, record one visible positional clue and its location on the model. Ask the instructor to check uncertain identifications. [2]
- Return the models to their assigned places. Follow the local cleaning rule and wash hands after handling shared items. [1]
5. Calculation, graph, or images as appropriate
There is no calculation. Enter observations from the actual chart or model. [2]
| Region | Structures to locate | Positional clue | Seen on local model? |
|---|---|---|---|
| Pectoral girdle | Clavicle, scapula | Connects upper limb to trunk | Record here |
| Upper arm and forearm | Humerus, radius, ulna | Forearm lies distal to arm | Record here |
| Hand | Carpals, metacarpals, phalanges | Wrist, palm, digits | Record here |
| Pelvic girdle | Hip bone: ilium, ischium, pubis | Connects lower limb to trunk | Record here |
| Thigh and leg | Femur, patella, tibia, fibula | Leg lies distal to thigh | Record here |
| Foot | Tarsals, metatarsals, phalanges | Ankle, midfoot, toes | Record here |
Worked identification example: The long bone between the shoulder and elbow is the humerus. Its position, rather than its size alone, supports the identification. Record the actual model evidence here. [2]
6. Result
Appendicular structures identified on the assigned material: Record here. Record any region the model does not display separately from an identification that remains uncertain. [2]
7. References
- Pharmacy Council of India. Pharm.D. Regulations, 2008, Appendix A. Lists the appendicular skeleton as part II of the chart, model, and specimen study.
- Anderson BW, Ekblad J, Black AC, et al. Anatomy, Appendicular Skeleton. StatPearls. Appendicular regions and named bones.
- Figueroa C, Jozsa F, Le PH. Anatomy, Bony Pelvis and Lower Limb: Pelvis Bones. StatPearls. Hip-bone components and relation to the sacrum.
Back to Human Anatomy and Physiology Practicals · All Pharm D Practicals · Pharm D
Theory notes: Human Anatomy and Physiology